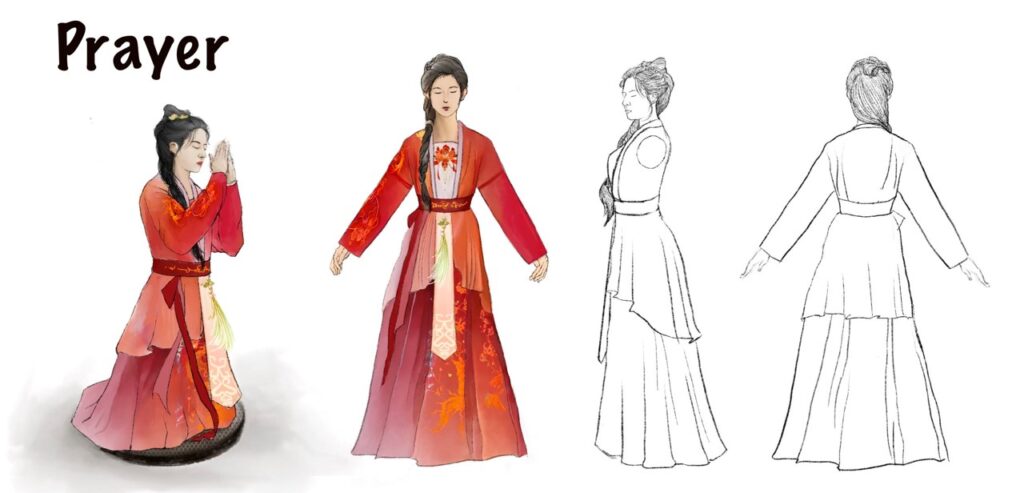
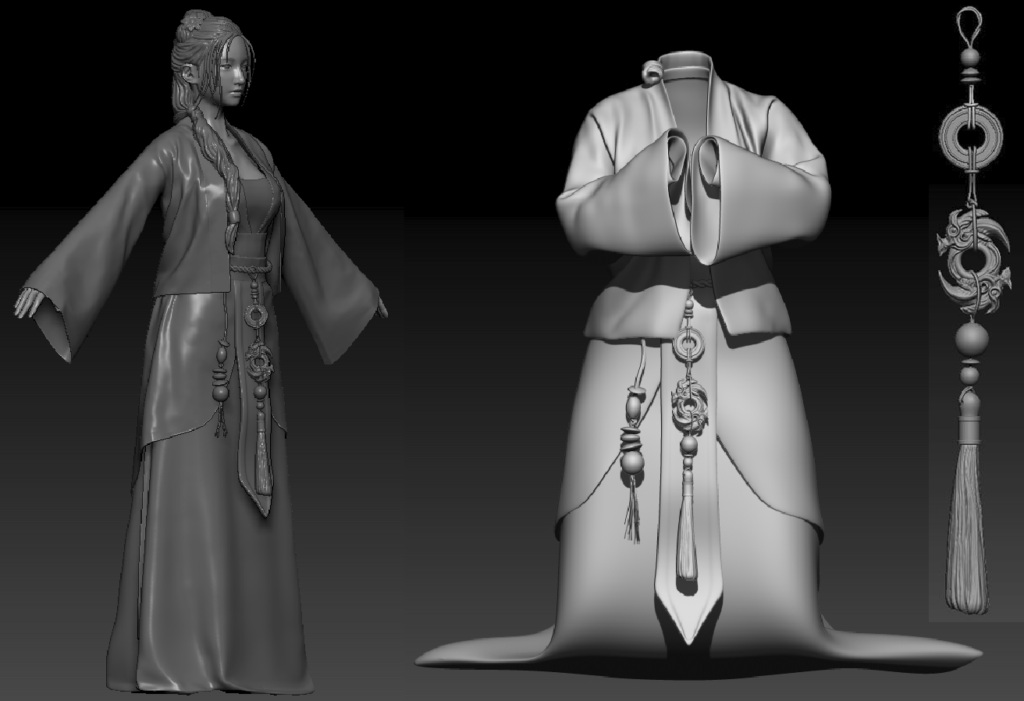
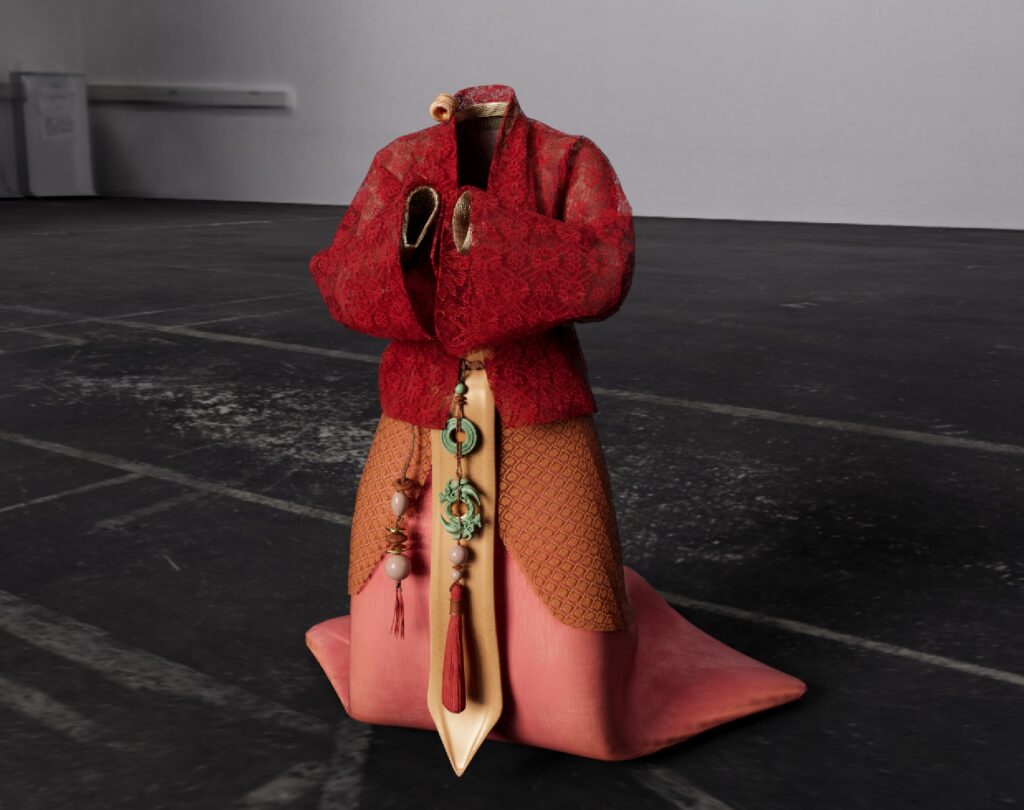
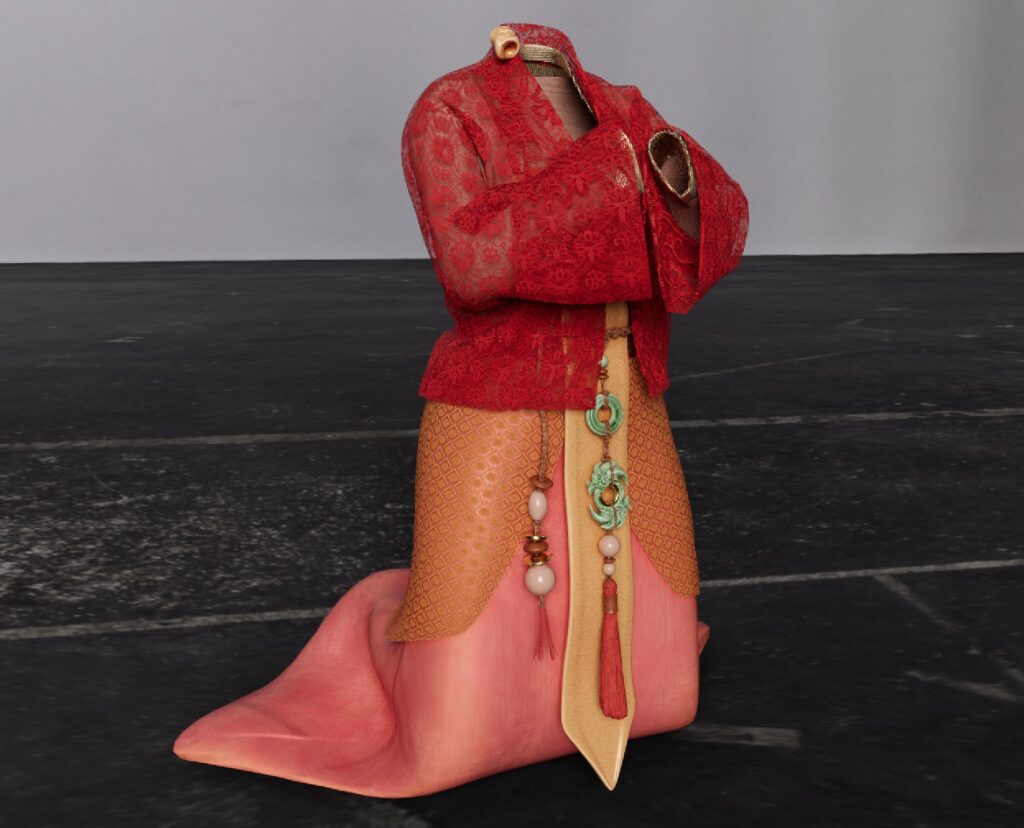
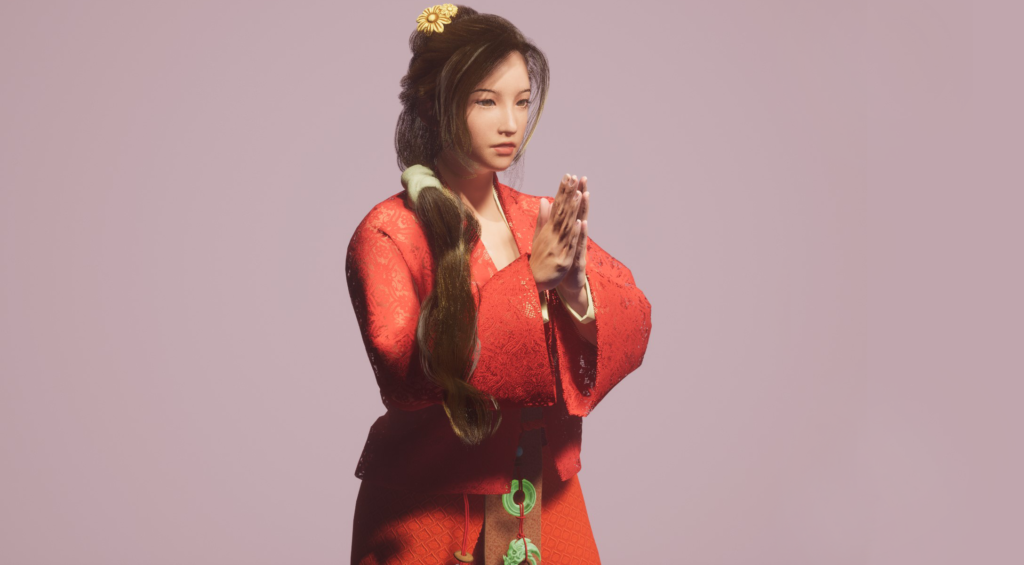
The overall design is a blend of Tang and Song clothing styles. The character wears a short top with narrow sleeves underneath, a Song-style smock on the outside, and a long skirt underneath. In order to avoid looking monotonous, I added embroidered patterns and accessories to the character. I created the final concept drawing, labeling each part of the figure with the approximate material I intend to present.
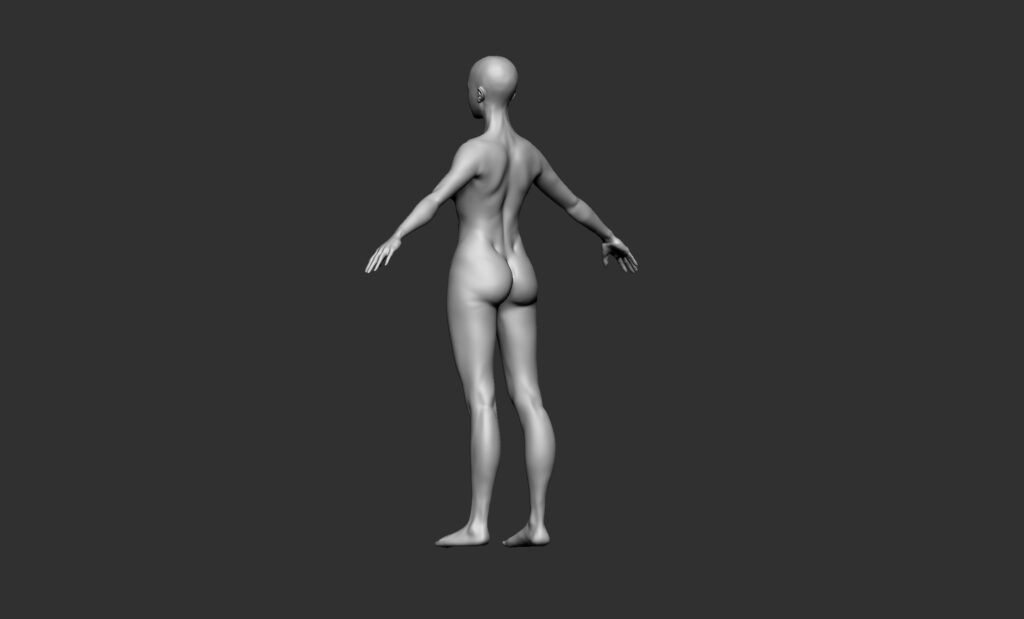
For the character modeling process, I began by sculpting and refining the highly detailed model in ZBrush. During the creation of the high-poly model, I paid attention to the proportions, musculature, and facial features of the body to ensure the final character looked cohesive. Next, I exported the high-poly model to Maya, where I topologized it and created the UV maps. Once I had the low-poly model, I started posing the character. I chose to put the character in Mixamo to get the basic skeleton, a powerful animation resource platform. In Mixamo, I selected the appropriate pose for the character. After that, I exported it back to Maya to paint the weights and refine the pose, ensuring it looks natural.
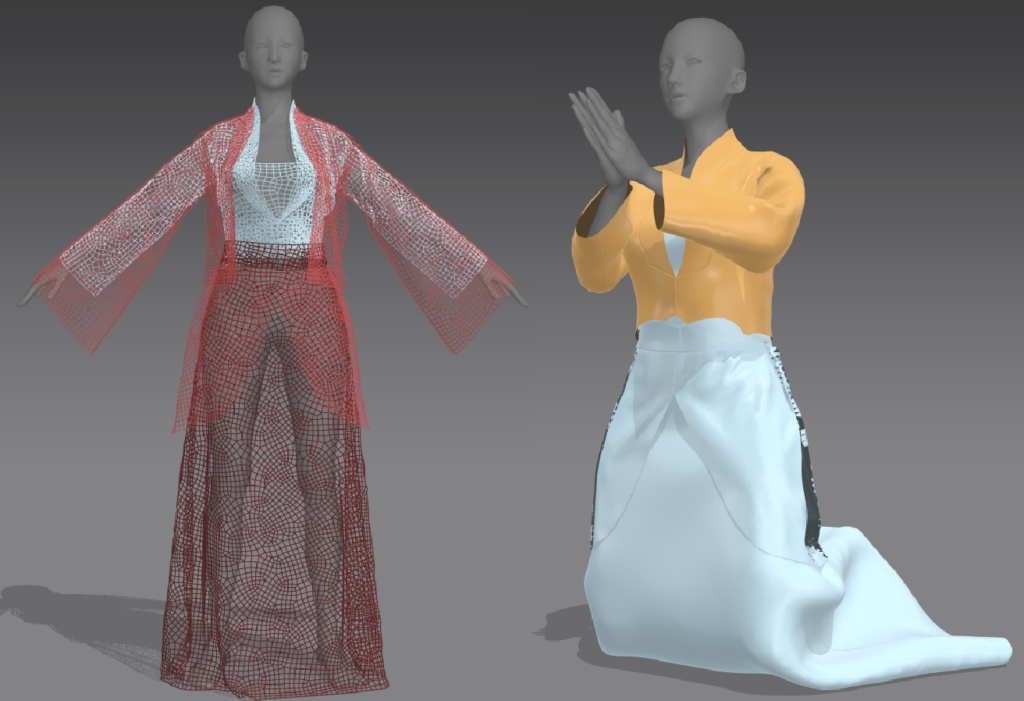
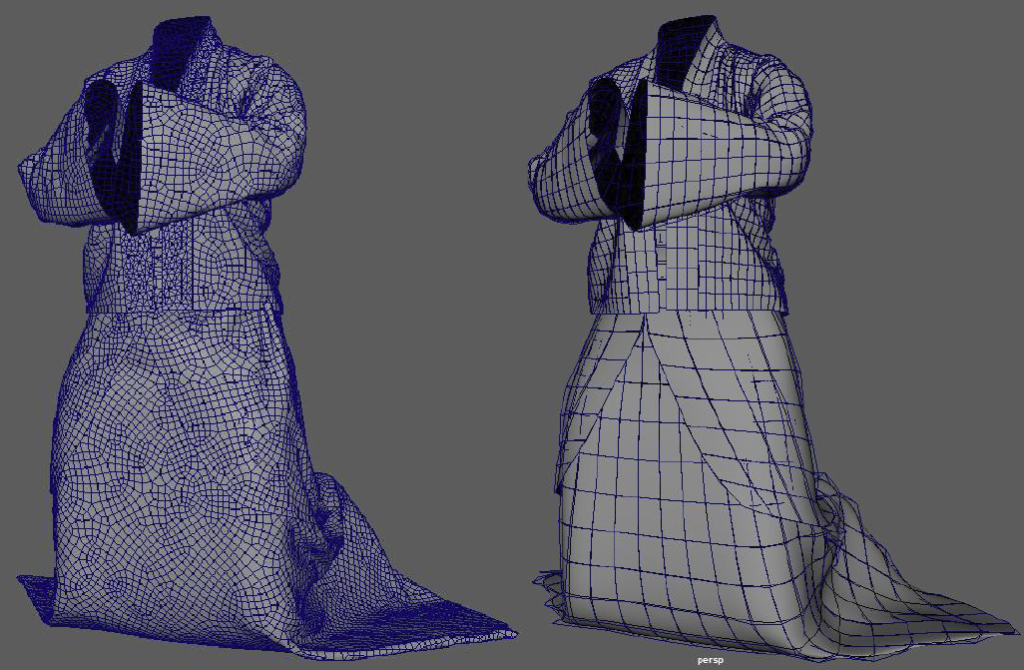
Next, I need to create costumes for the characters. These costumes are traditional Chinese attire, primarily made of silk or cotton and linen. Therefore, I chose to use Marvelous Designer for designing the fabrics. Beforehand, I made the rough shape of the costumes by painting masks in ZBrush. Upon importing the model into Marvelous Designer, the process involved two main steps: creating the costume in the A-pose and simulating it for the kneeling position. Initially, I imported my model and the rough costume shape into Marvelous Designer, selecting the appropriate fabric type. Using the editing tools, I adjusted the fabric’s position, shape, and folds. Then, in simulation mode, I made precise adjustments. Following this, I imported the kneeling character model and set up the Morph Target. This allowed the clothing to morph, fitting the kneeling character model based on the Morph Target information. Finally, by adjusting the properties of the fabric such as gravity and friction, I got a satisfactory result.
In Marvelous Designer, I adjusted the fabric and organized the UV, 2D, and 3D panels. Then, I imported them into Maya for topology and UV transfer.
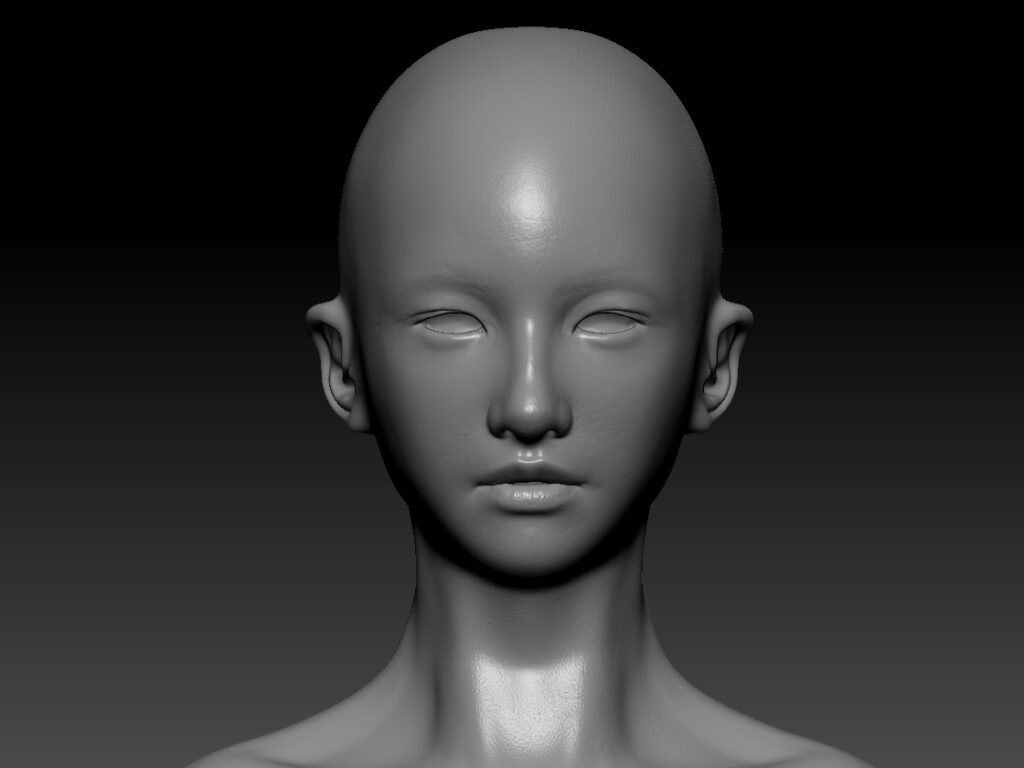
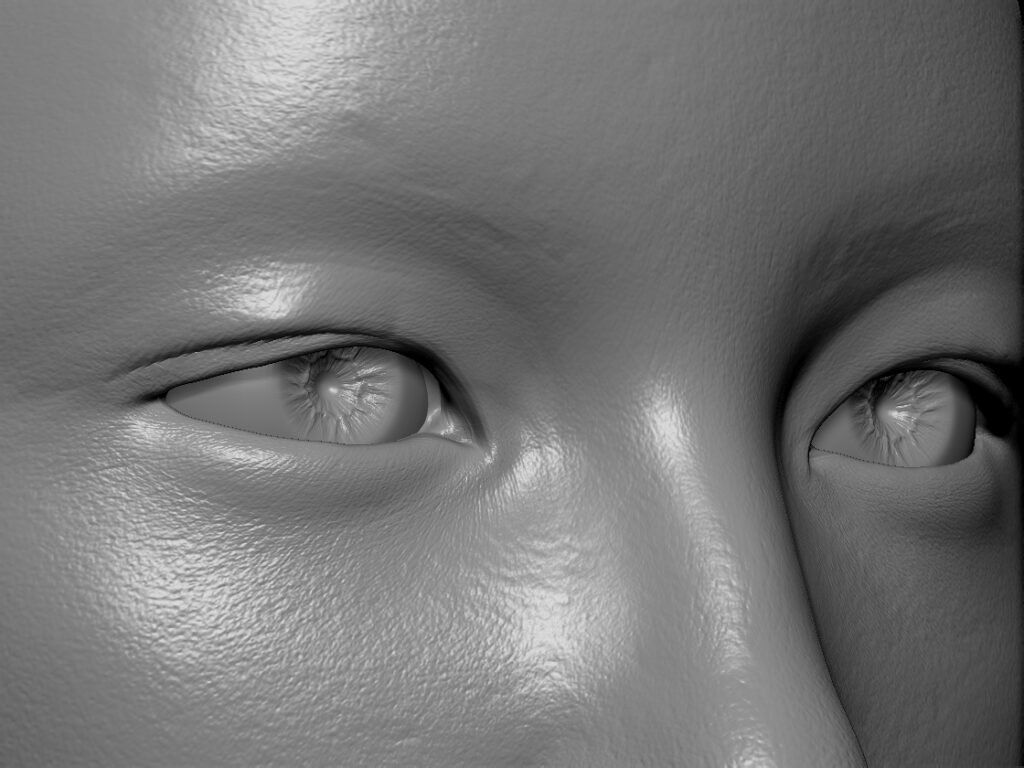
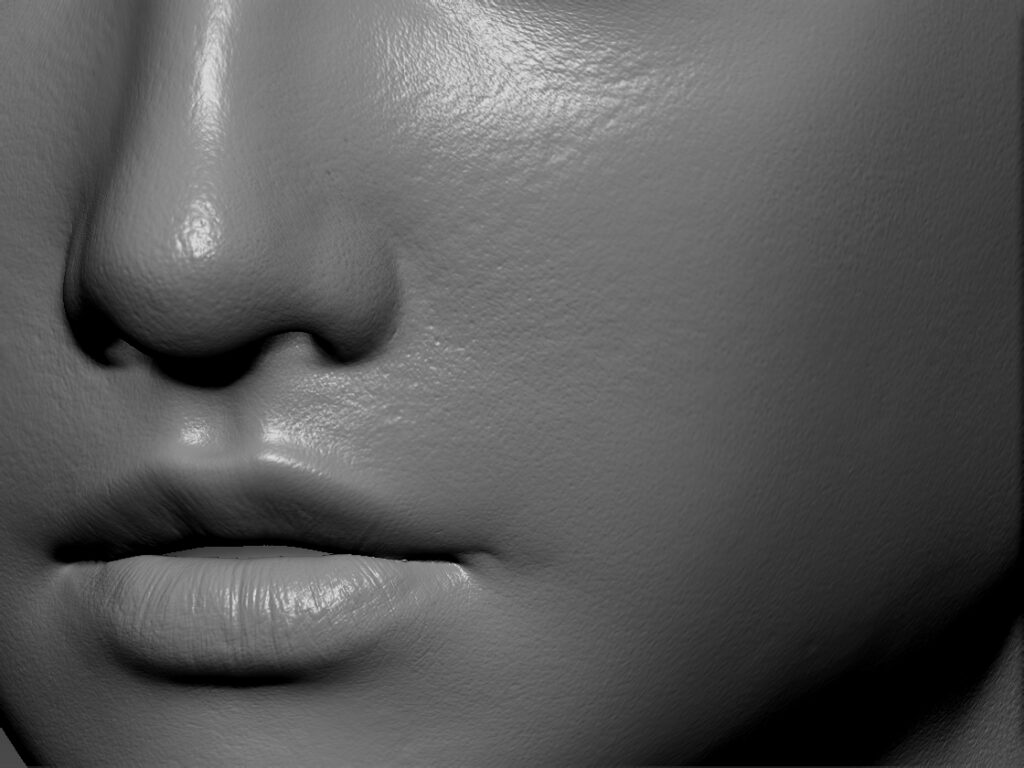
The next steps I’m going to take are to add details to the face and hands of the character to look more realistic. Modify the replacement map in Photoshop and separate its RGB channel. Import the replacement maps separately in ZBrush and adjust the detail intensity in layers. Add skin details and sculpt pupils. Use Wrap 4D to give XYZ texture to the model and get the base skin texture. Then sculpt and add different details with alpha brushes.
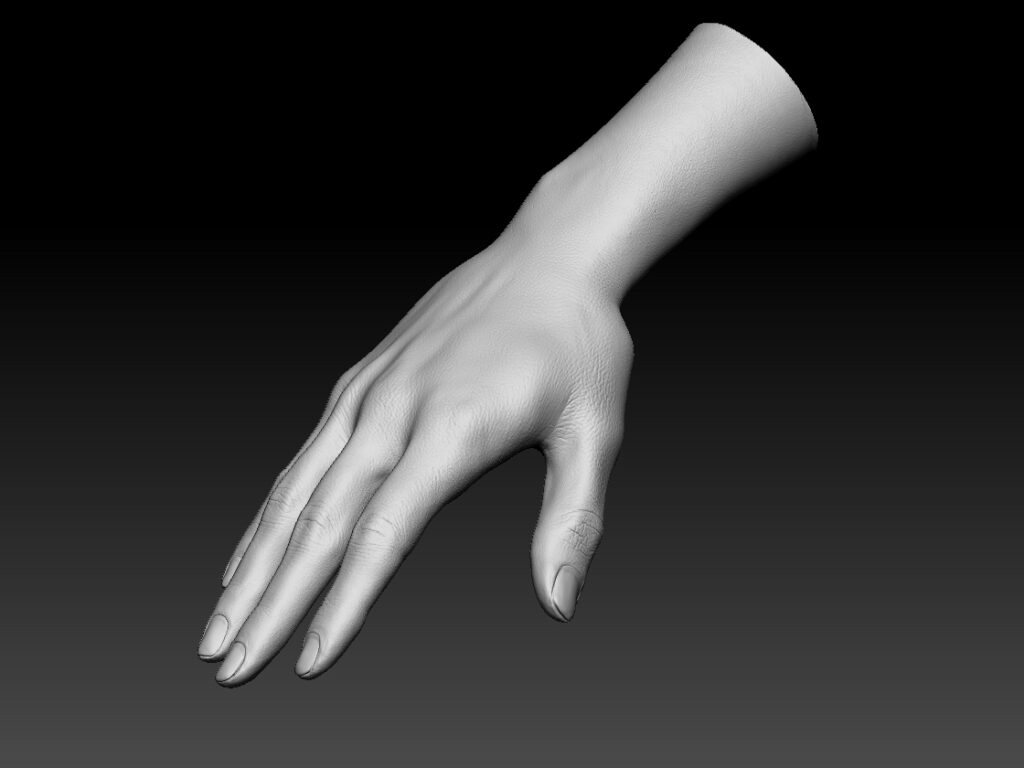
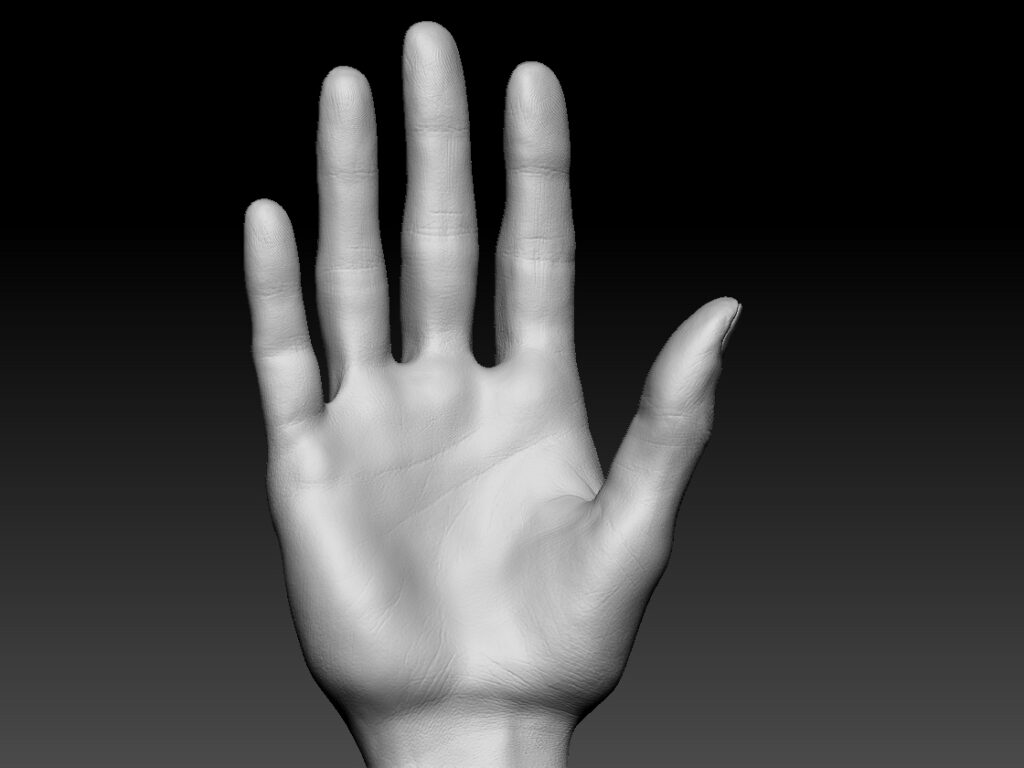
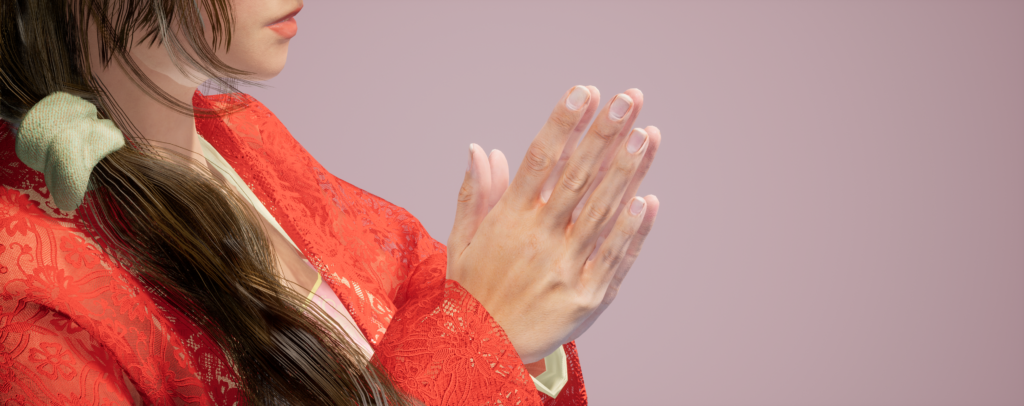
I made the replacement maps for the hands in the same way, and then made the details in ZBrush. These are the color map, the displacement map and the normal map of the hand. The base detail is obtained by displacing the map and then adding more details for sculpting. The hand texture is more detailed and unique.
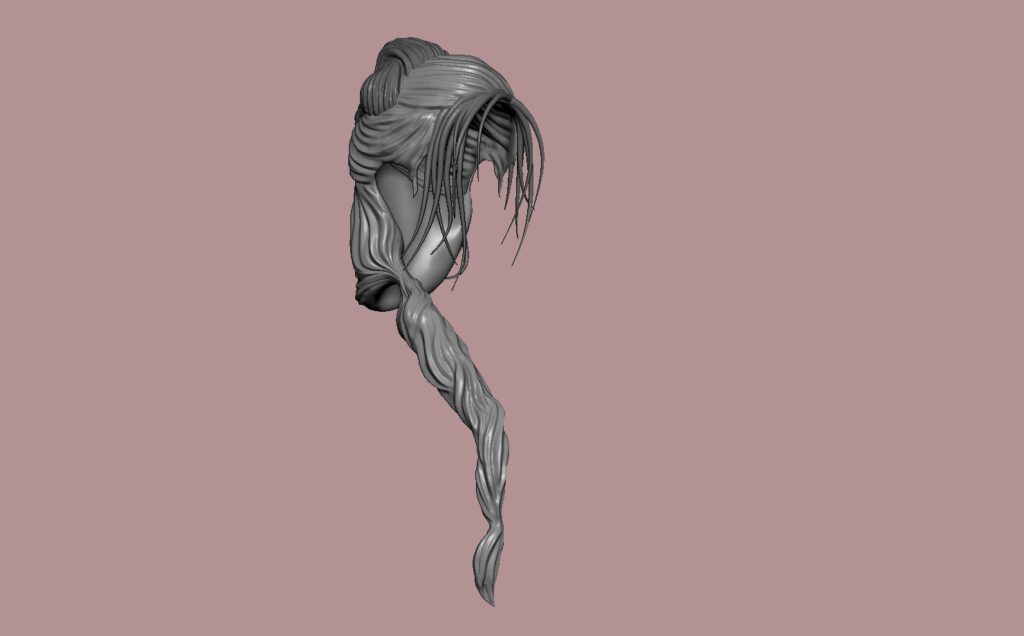
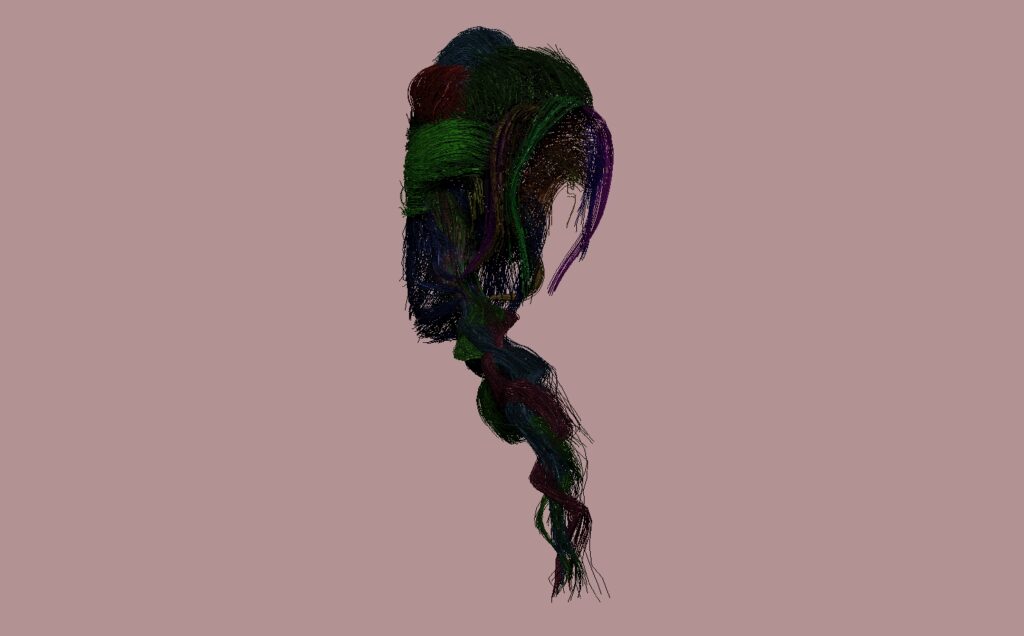
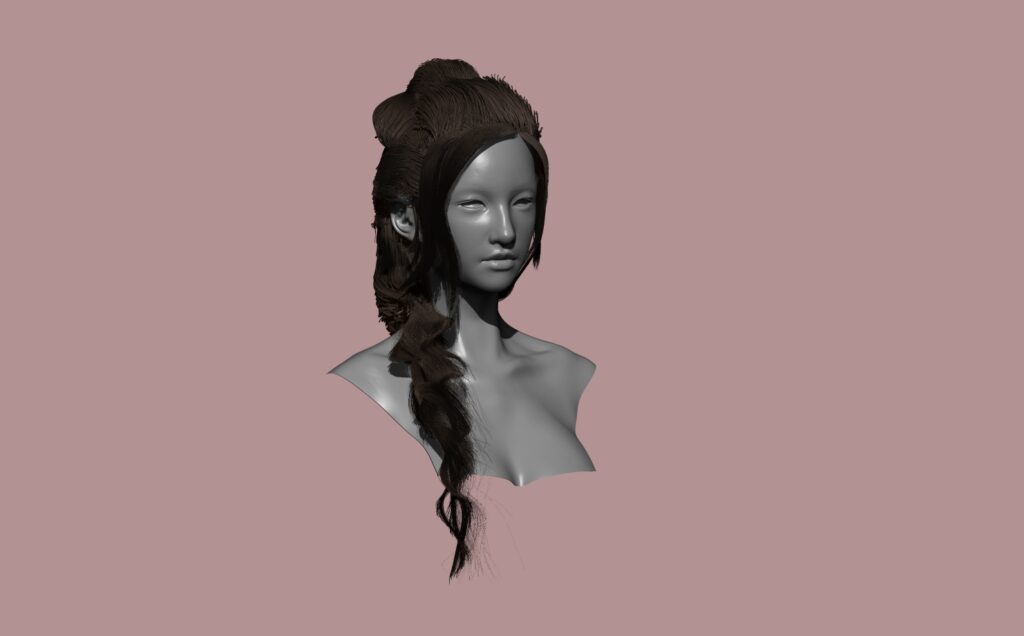
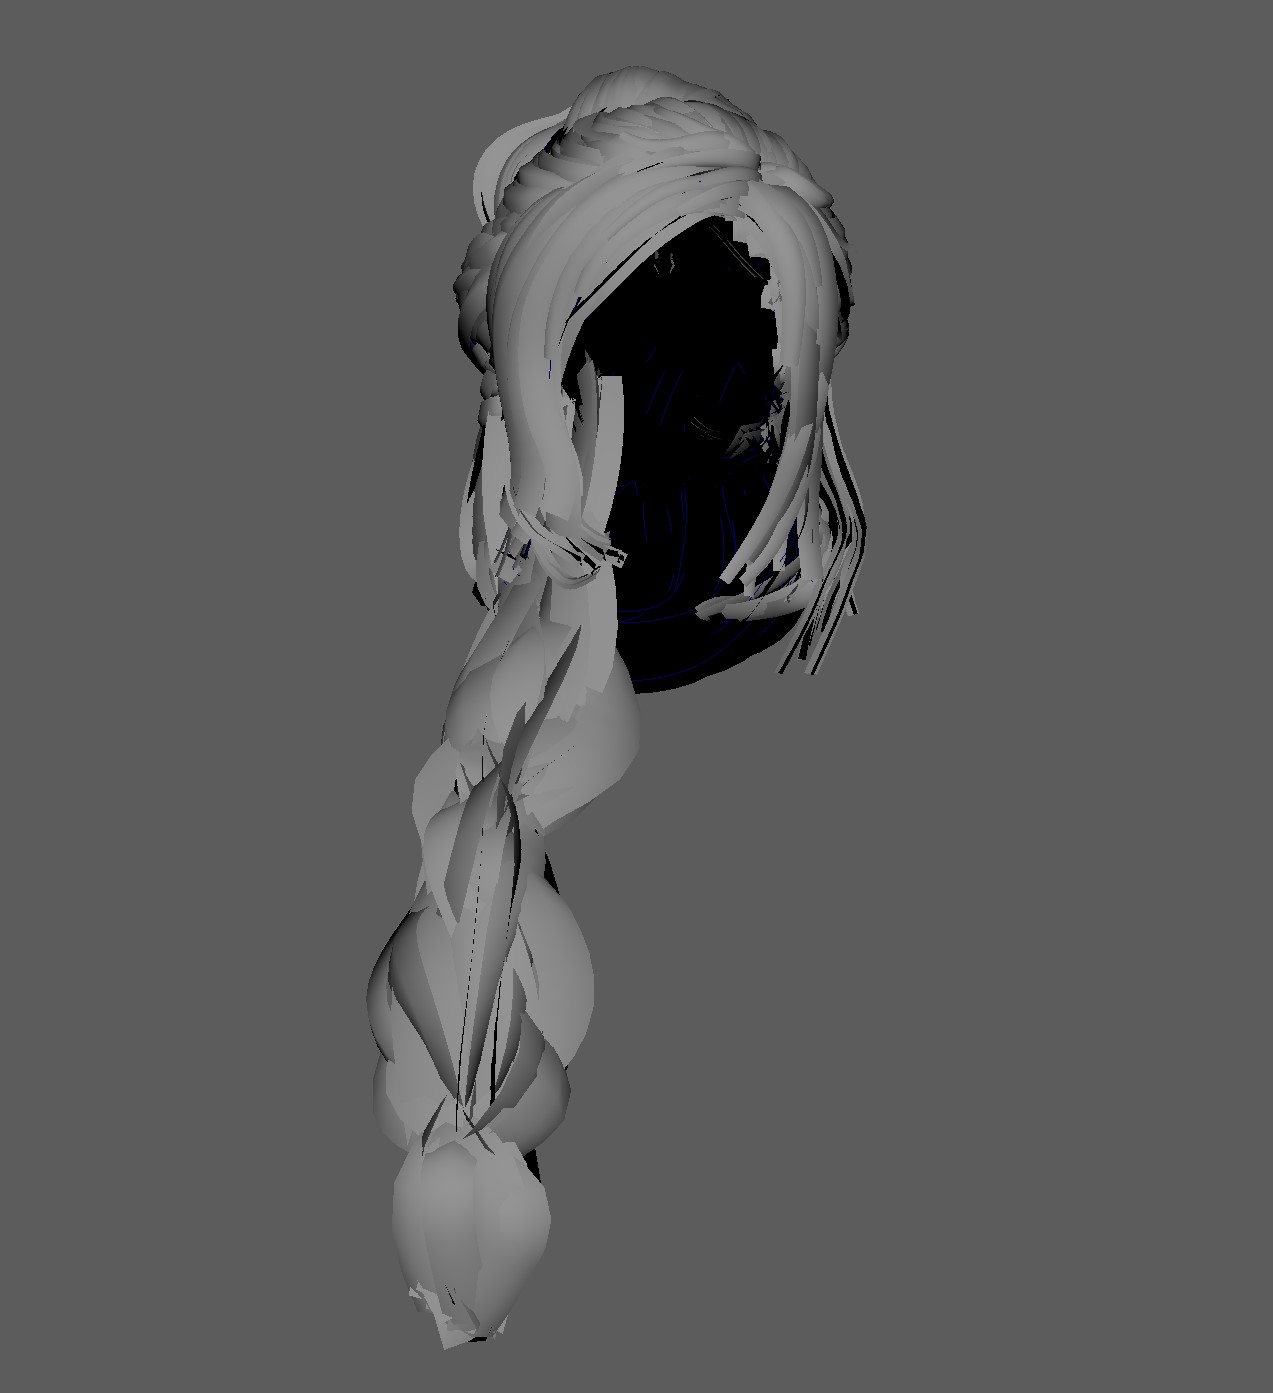
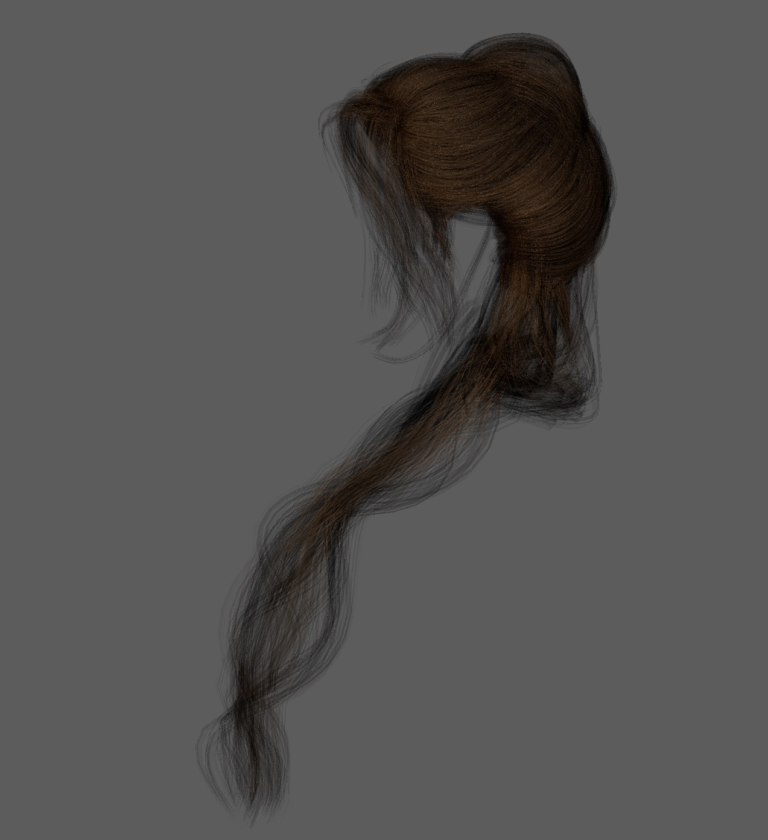
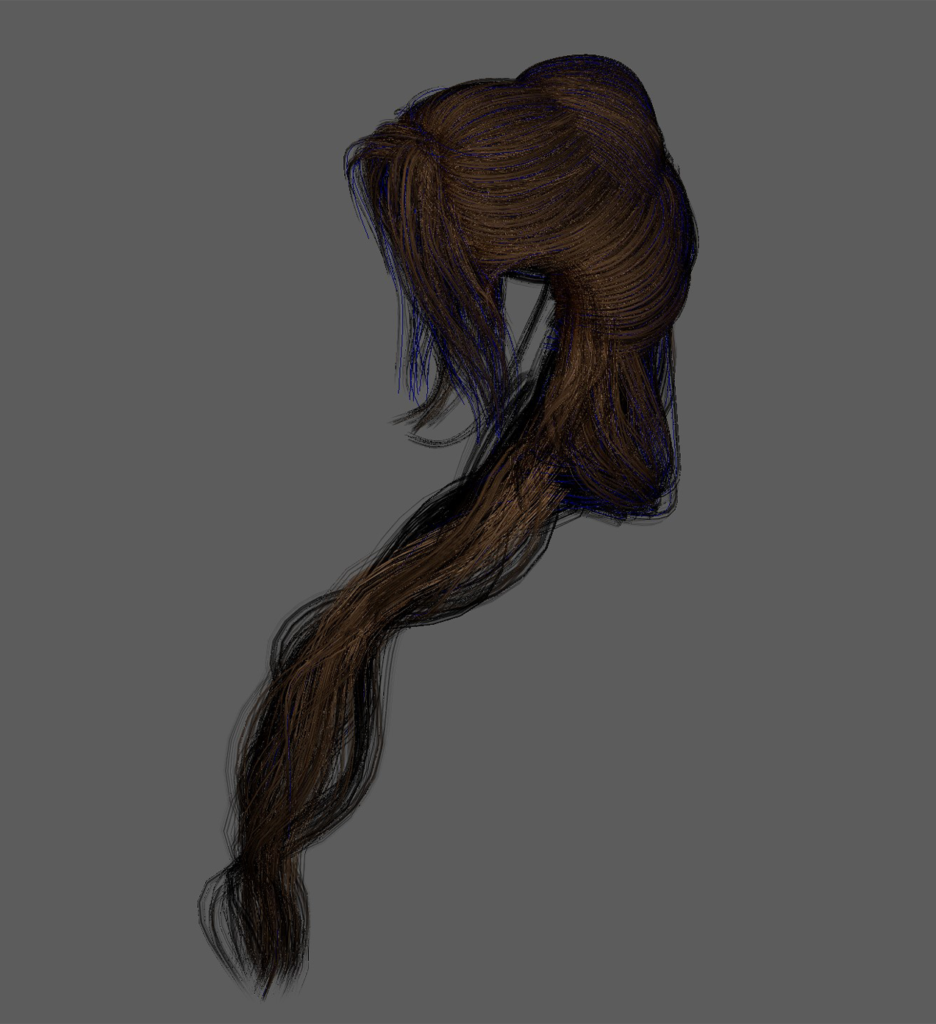
To create hair for a character, I start by sculpting a basic hairstyle in ZBrush. Then, I group the hairstyles and generate Fibermesh, which is a tool used in ZBrush to simulate hair. Next, I export the generated Fibermesh as curves. After importing the basic model of the character’s head and the curves into Maya, I begin creating the hair cards. Hair cards are used to create the actual hair strands based on the paths of the curves. I adjust the shape, curvature, and length of the hair cards to make them look more natural.
Finally, I import the created hair cards into Unreal Engine along with the character to complete the entire process of creating the character’s hair. In Unreal Engine, I further adjust the hair’s material using the material blueprint to achieve a realistic look.
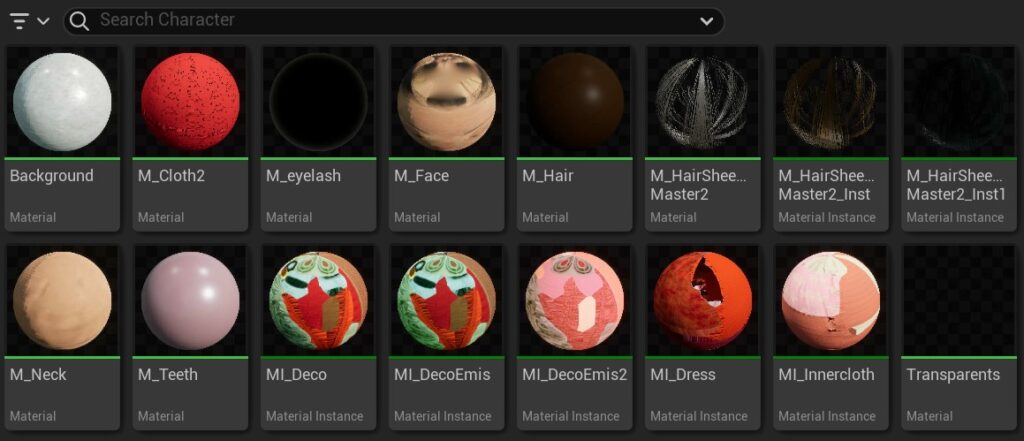
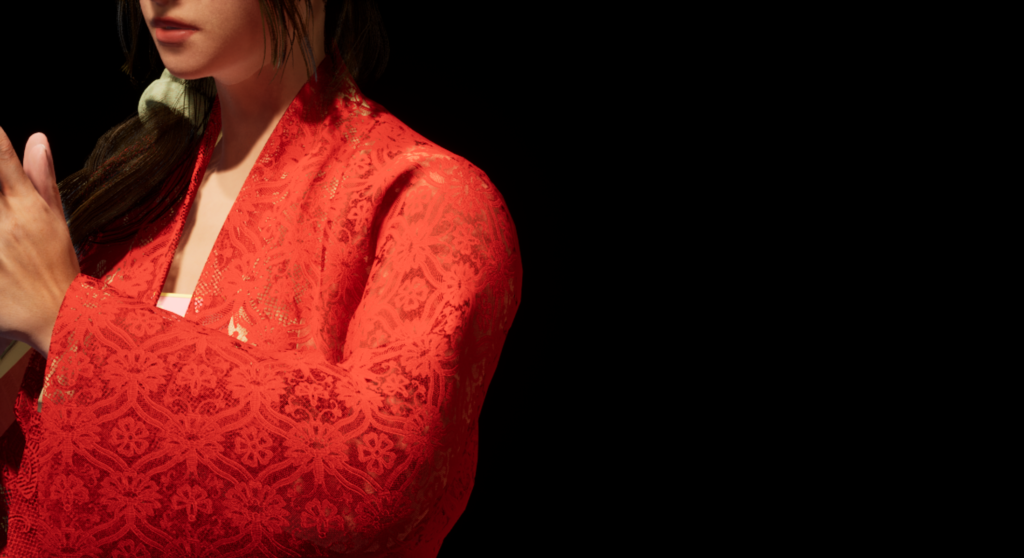
A total of three layers of clothes were made, which are the inner wear, underwear and outerwear. Inner wear can only see the front piece, I made the embroidery pattern. Underwear is mainly to give the clothes a base color, because the outerwear is embroidered with a hollow. After I am done making my materials in Substance Painter, I export all the materials in separate channels. Next, go to Unreal Engine and render the character. Then, I create the material sphere in UE and put it on the model. After adjusting the camera angle, I set the main light source for the character as well as the ambient light.