My name is Zihan Liang. I am a student from SCAD. My major is animation, but I have changed my goals to game development, 3D environments development, and 3D characters. That is why I started to study materials and shaders. This is my new project for my texture class.
Inspiration and reference:
The main inspiration for this project came from photos, and renderings from different CG websites. I was also inspired by other artists. I collected many reference images on the internet. Then I conceived the composition I was looking for in my mind.
Modelling:
Once I decided on the direction of my project, I started modelling in Maya. From rough geometry to adding details at the end, once I finished the model, I started making UV maps. I finally split 4 UV maps for my model. One for the background, one for the barrel, and two for the guitar.
Texturing:
I used Substance 3D designer and Substance 3D painter to create the texture. I first made the primary materials in SD and then published them to SP for further painting. Finally, I export the textures I need for the next step.
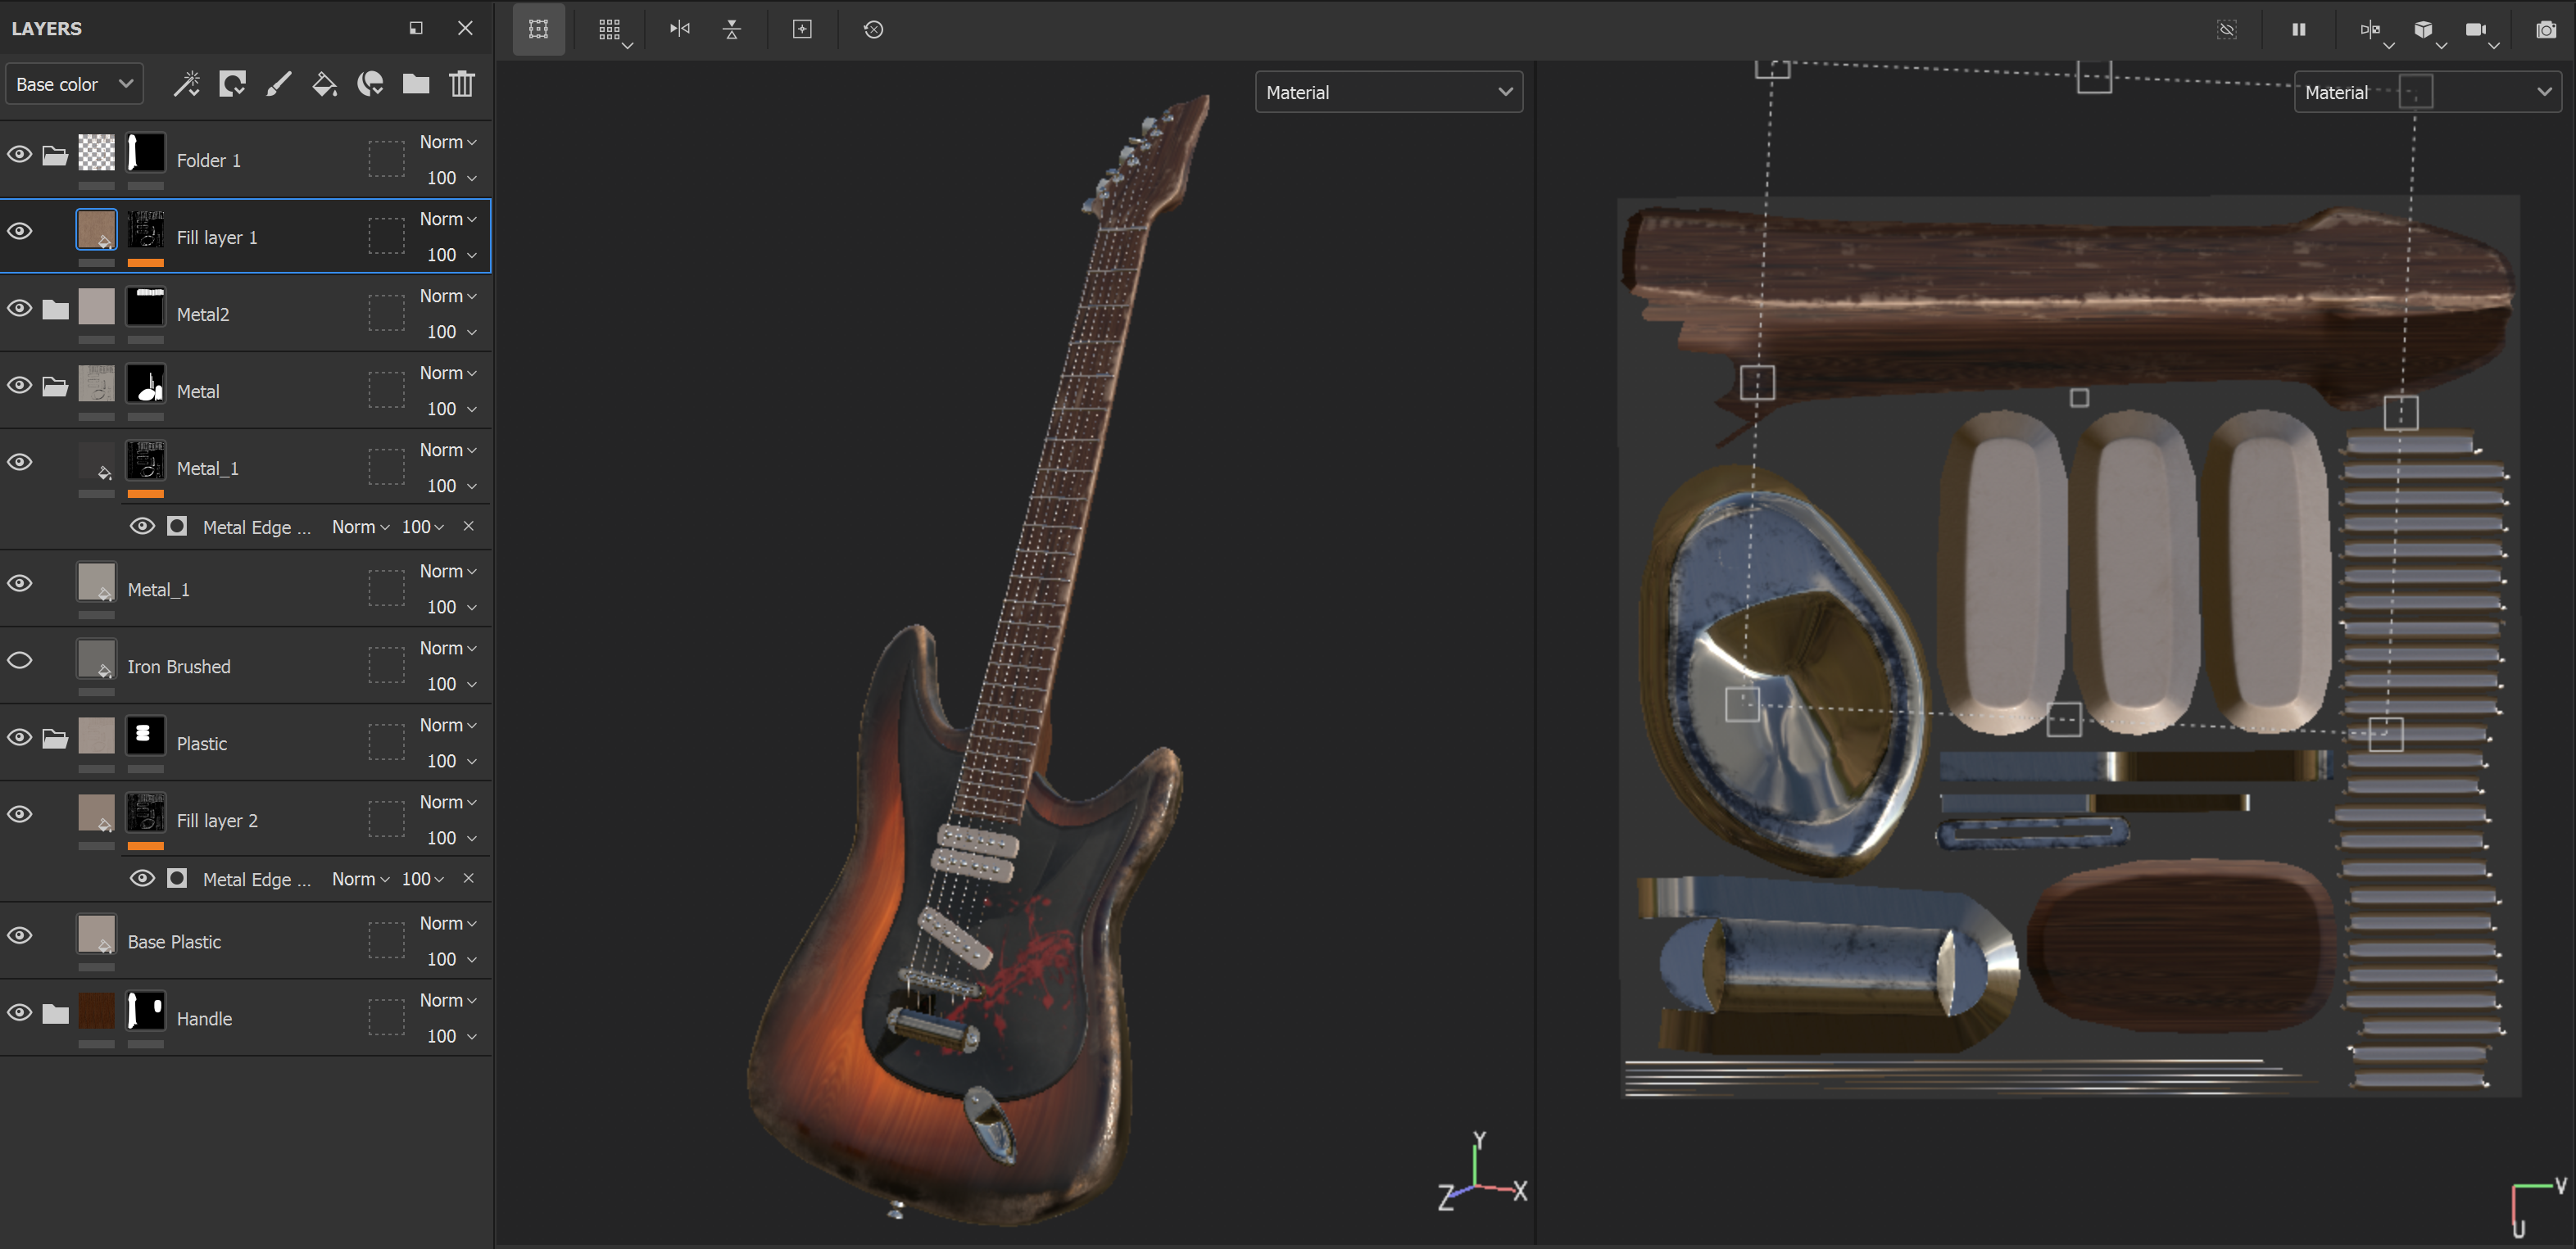
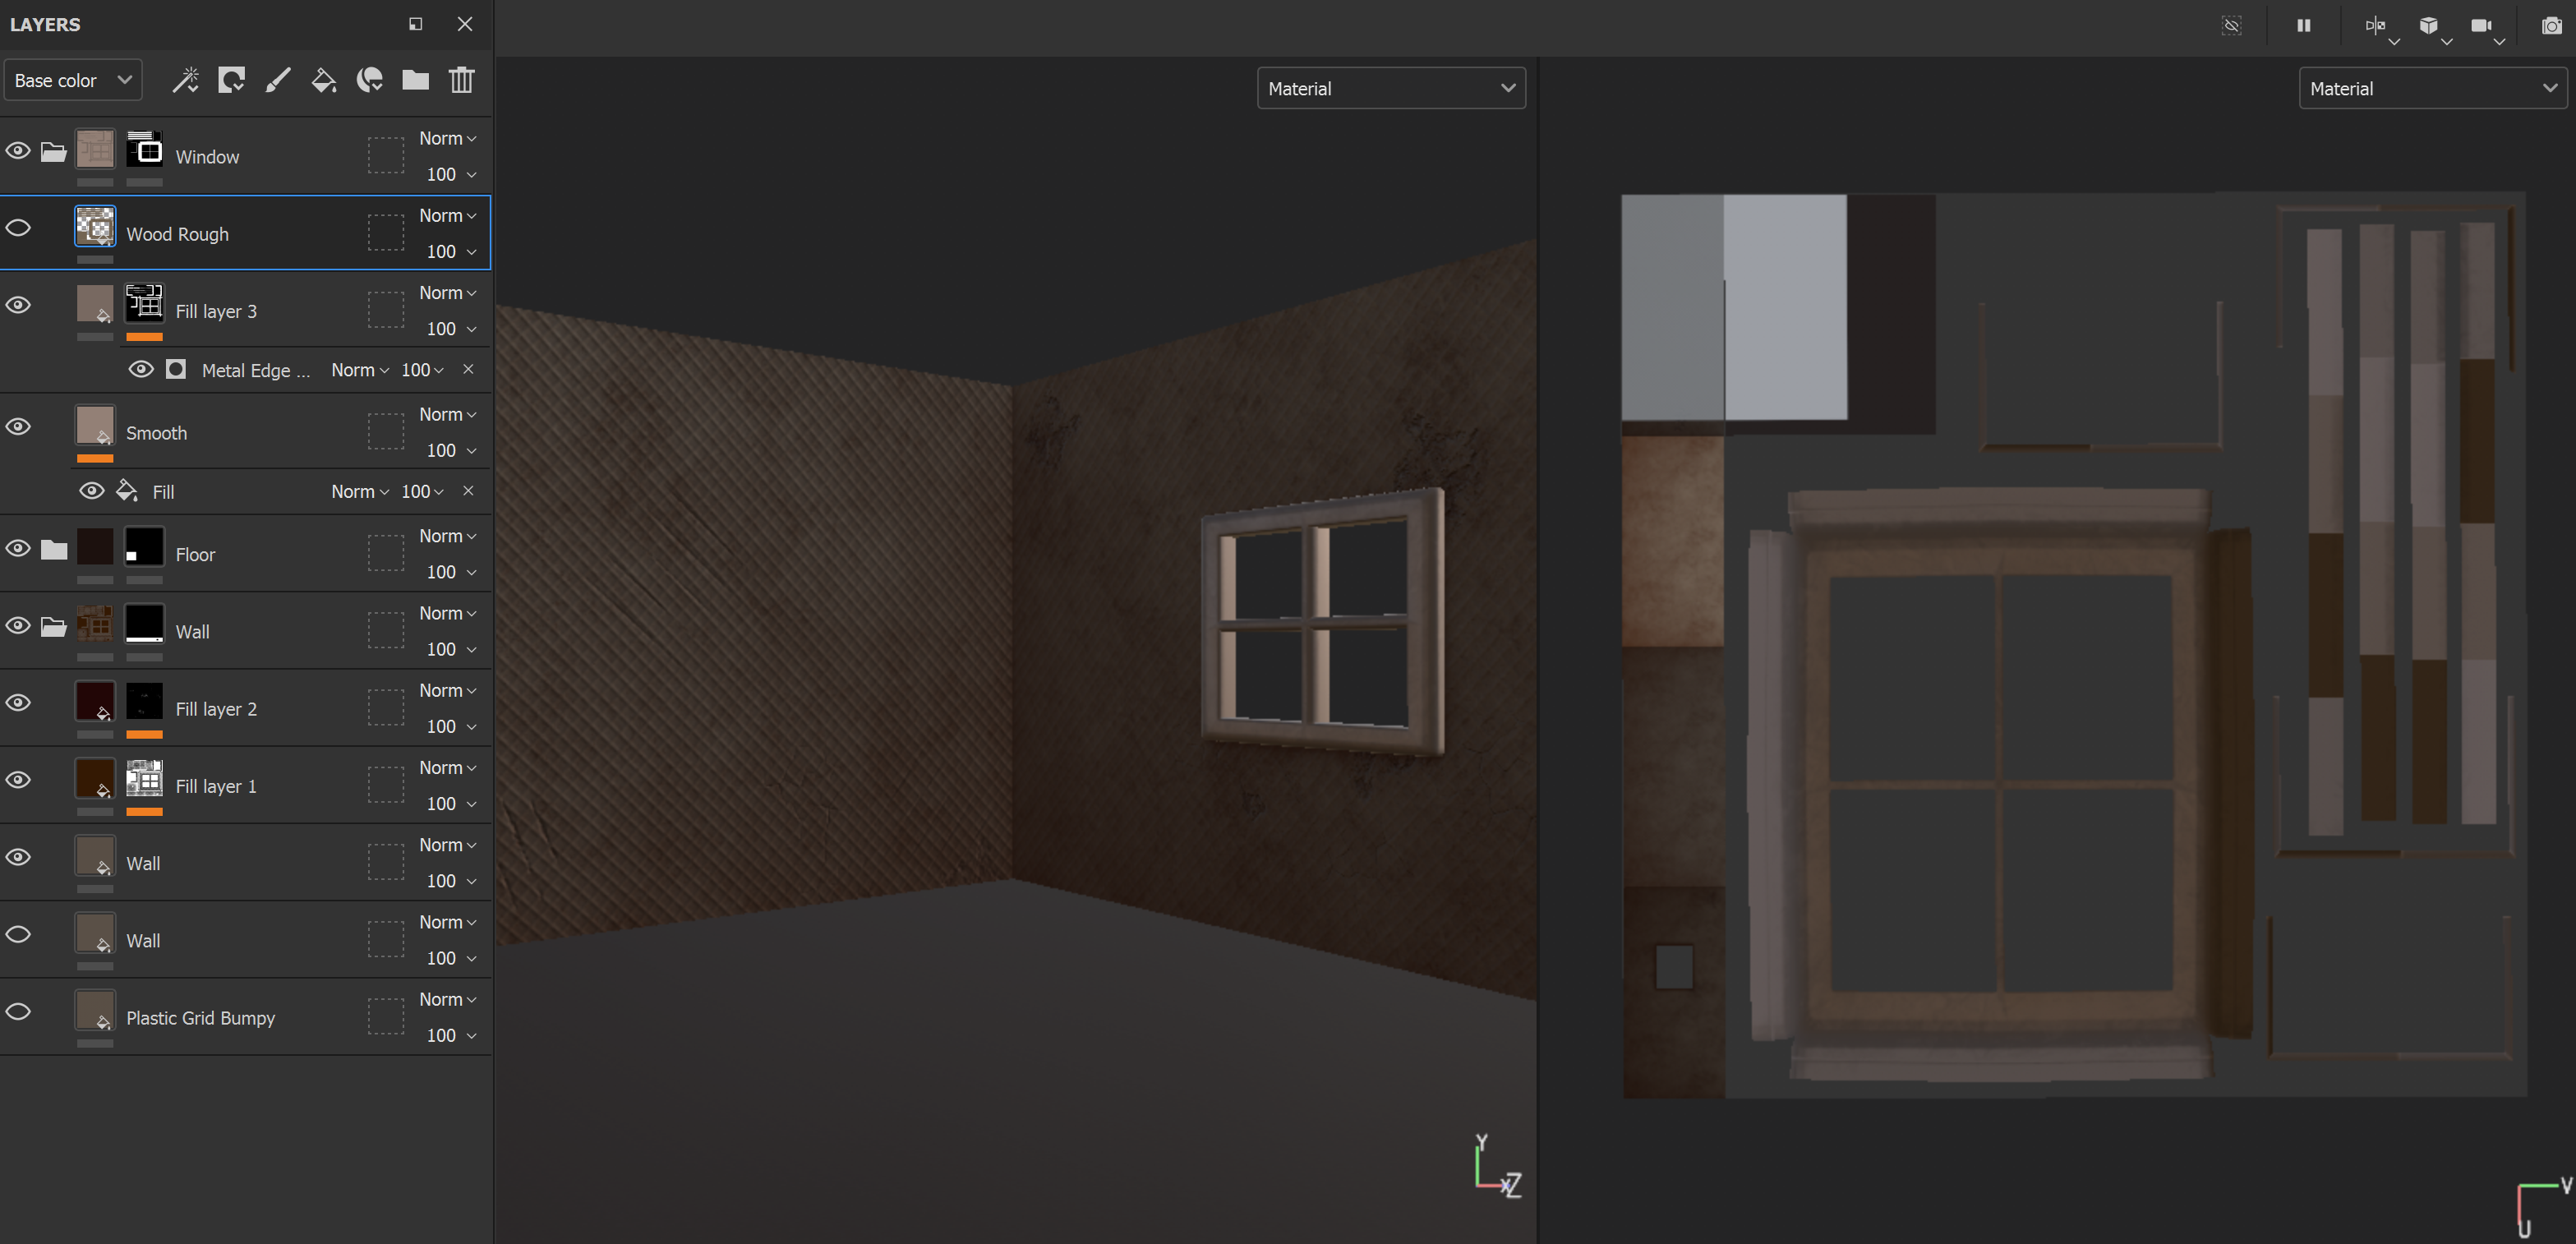
In the New Version, I first make the base material in Substance 3D Designer. For example, I start by adjusting the tile generator for Barrel’s wood texture. Then find a proper noise warp them so that my wood texture appears as some rounded, slight annual wheel-like texture. Then look for different dirty spots and noises and add details layer by layer. Then adjust the color according to the reference—finally export parameters for some nodes.
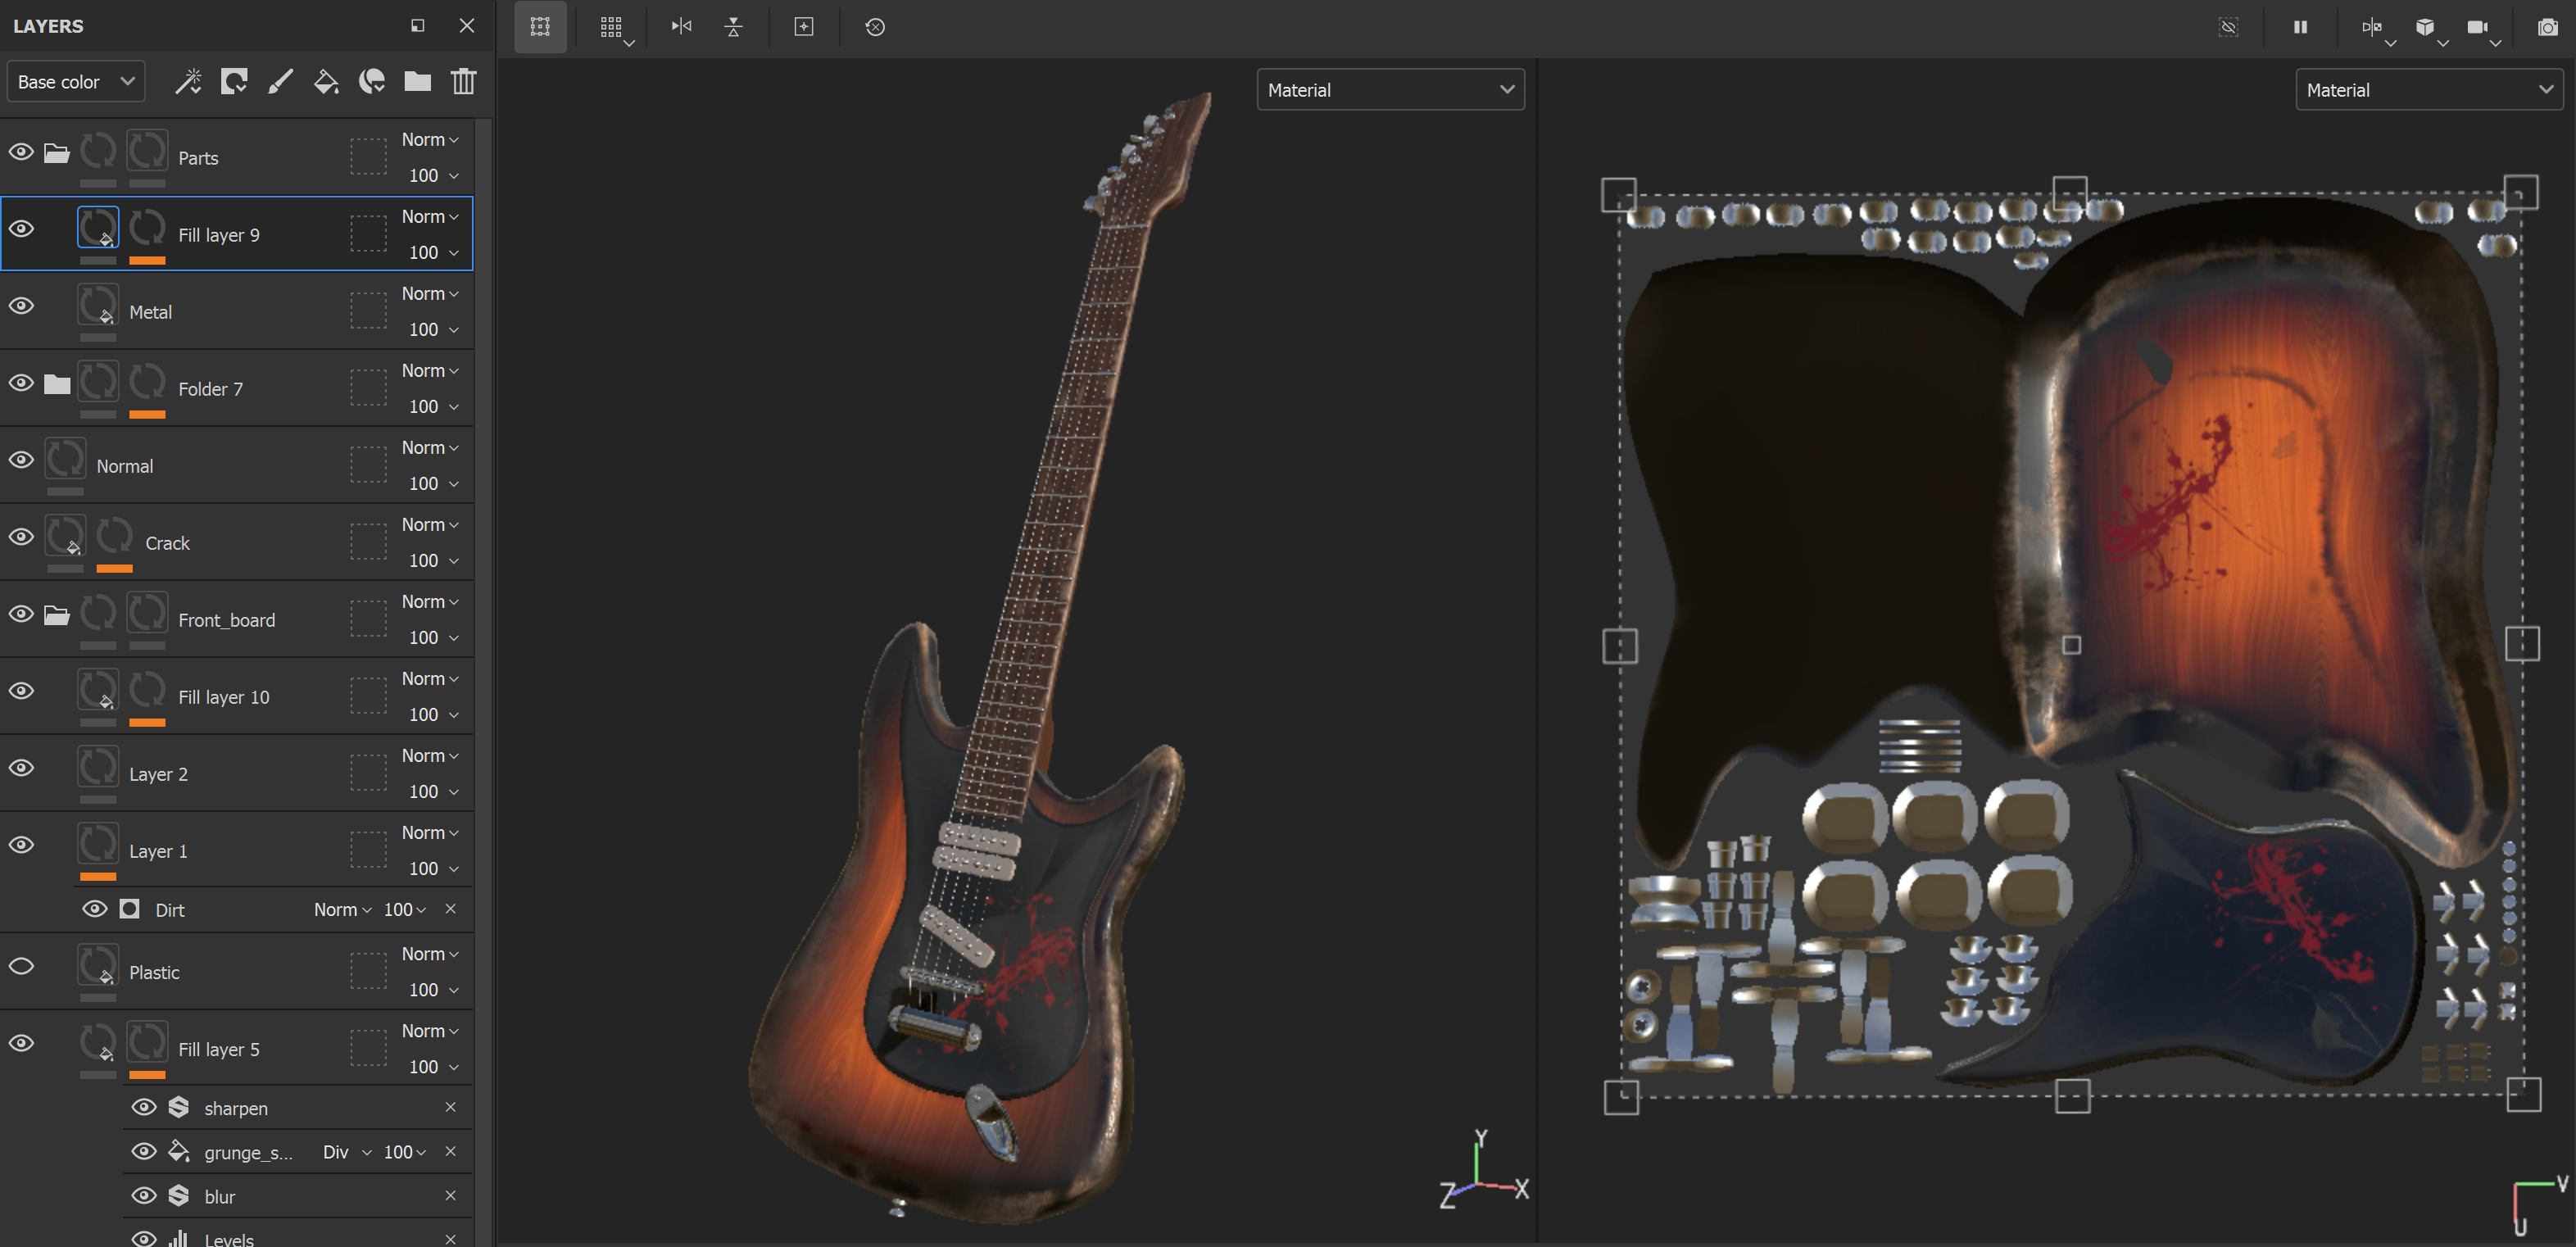
In the Old Version, I created it mainly in Substance 3D Painter. I looked closely at many references. Instruments like basses and guitars will show some wear around the edges over time. First, I adjust the parameters of the base material to change the color, roughness, and normal intensity. Next, add a mask for the needed parts, then add generators and filters in the mask. Finally, add some paint layer, and use the dirty brush to paint the details.
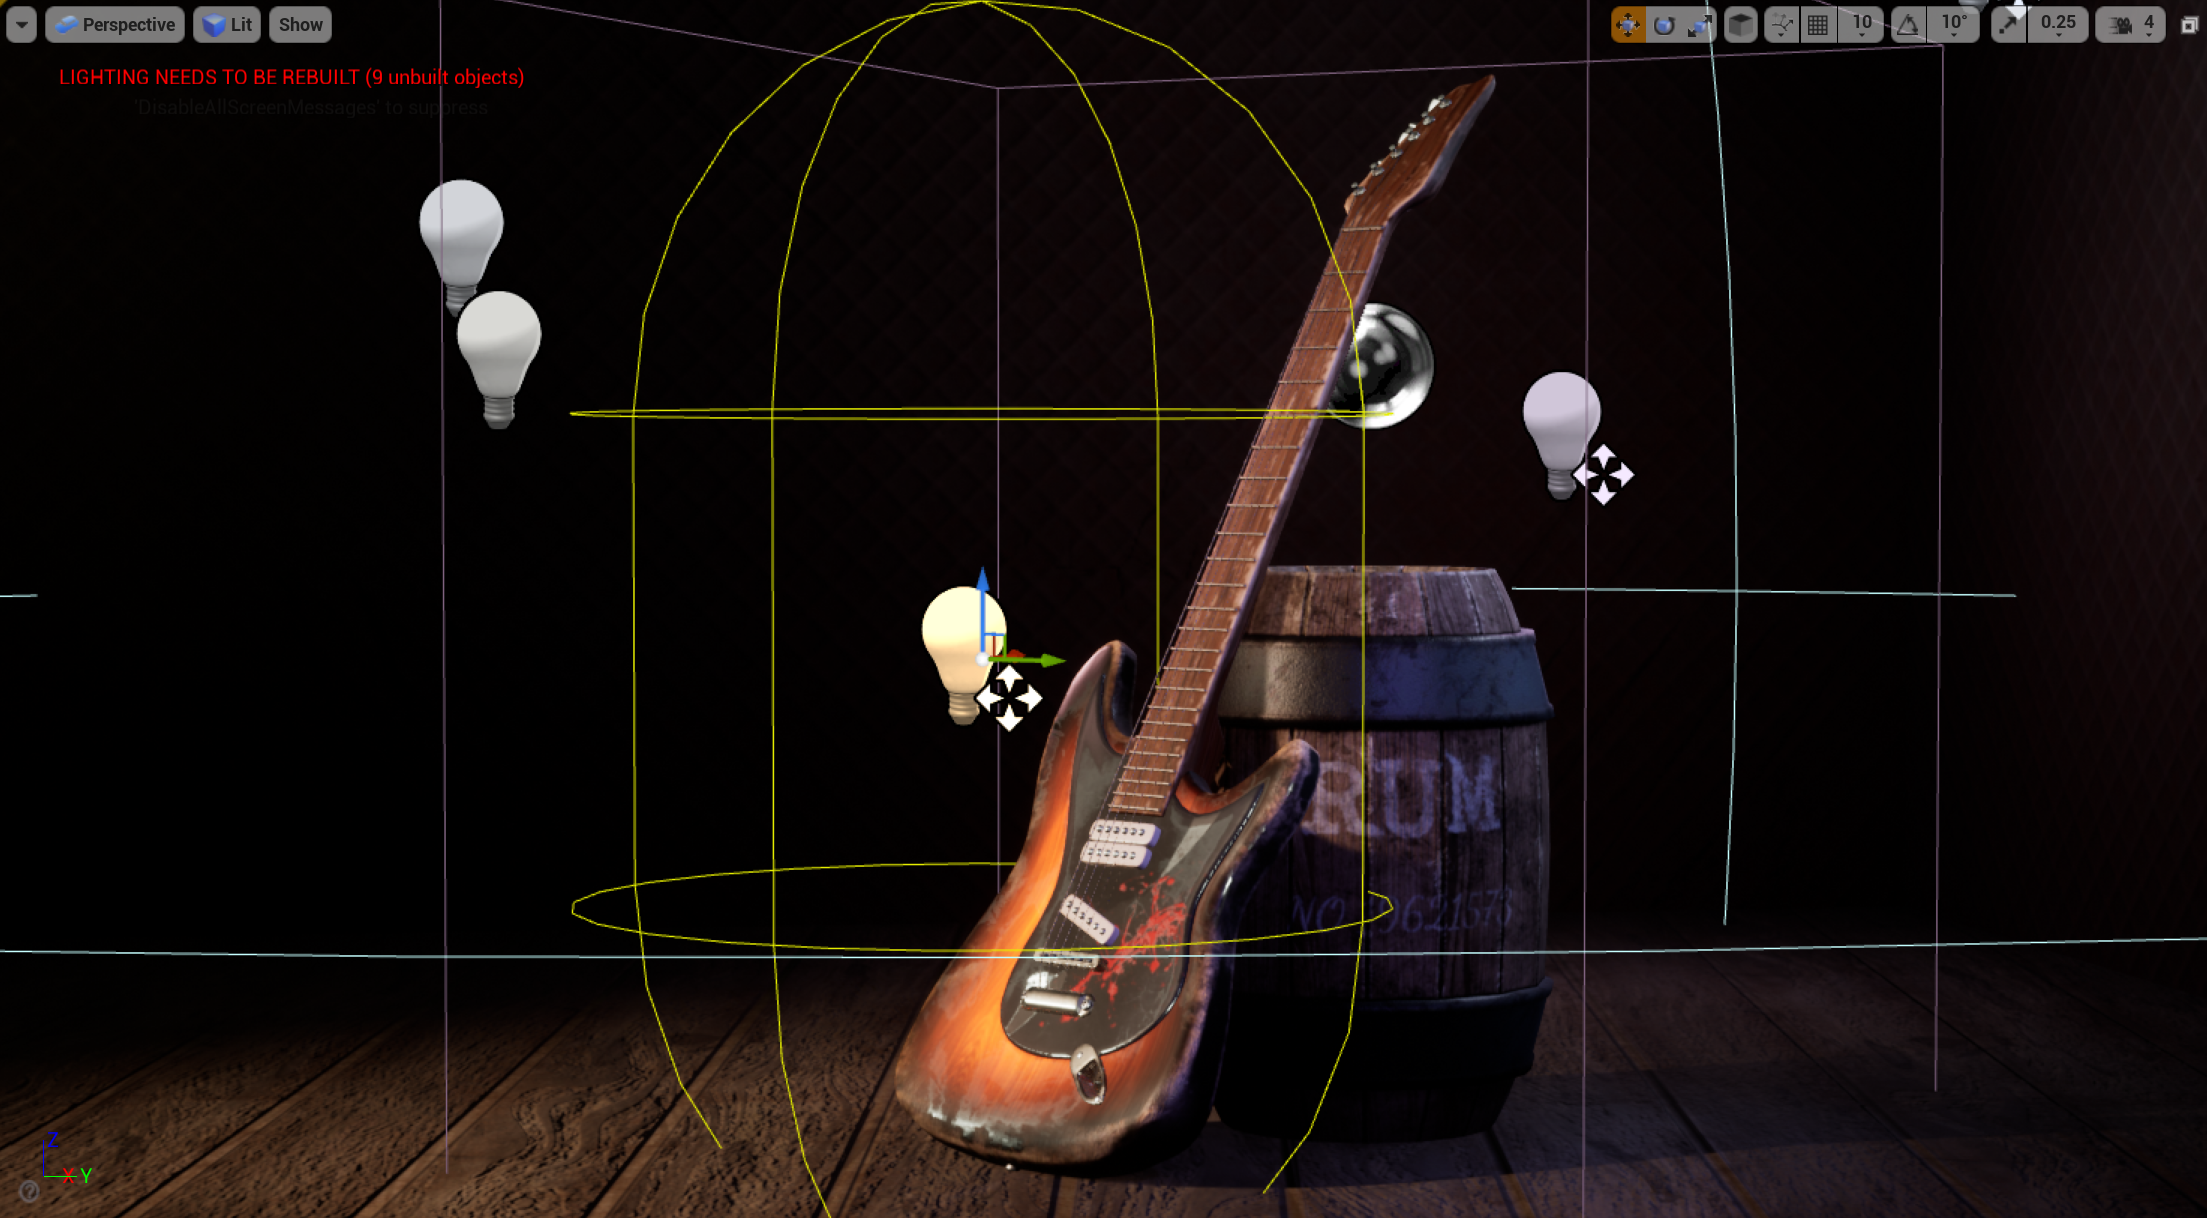
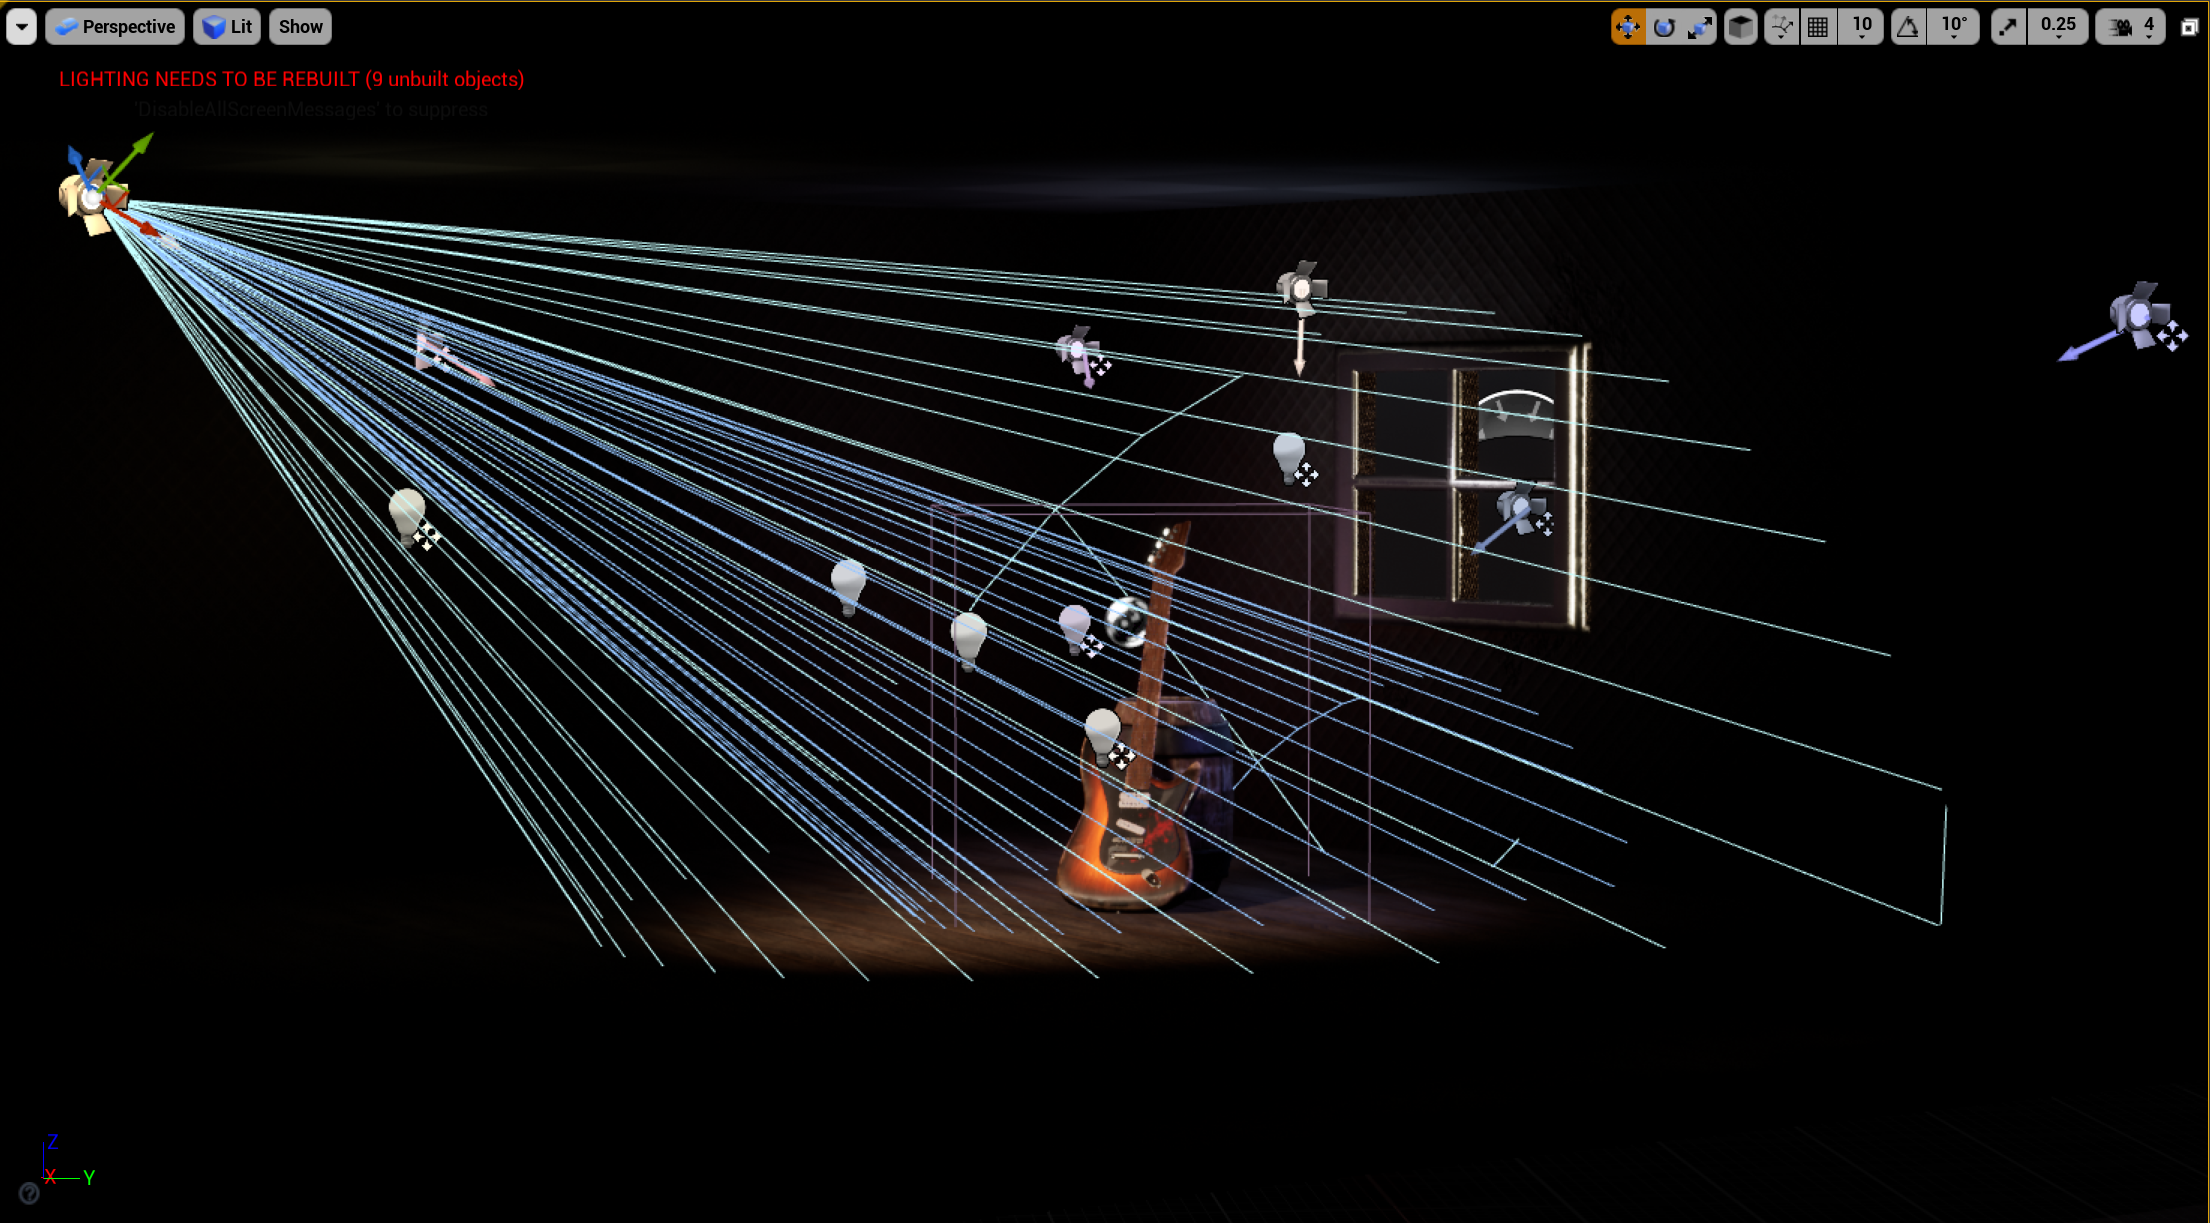
Lighting:
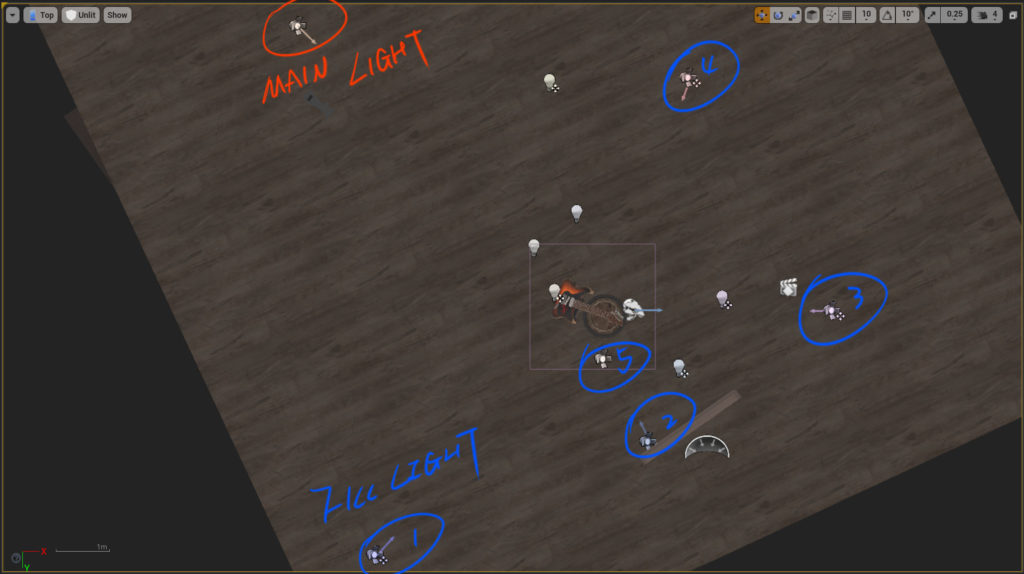
I built my lights in Unreal Engine, except for one main light source. I set up five fill lights in the corners of the room. The rest of the point lights match the camera’s movement and light up the focal point part. We can not simply turn up the brightness of the main light source, which will make some places overexposed, and point lights can let me easily control. These point lights will light up in turn when the camera moves to the part that the audience needs to observe. In addition, I used the post process to add some light sources to make the lighting look more natural. For post-processing, I added a studio light source for HDRI.
Unreal Engine Renderings:
I create the material assets in Unreal Engine, then add nodes to the material assets according to the different needs of each material. Then add parameters for the nodes that need to be adjusted. Finally, I create instances for the material and adjust them.
I already set up my Unreal Engine scene with lights in the final stage and adjusted the overall effect. After that, I looked for some camera angles and smooth movements to allow the audience to look at the details of each material better.
New Version:
Old Version:
New:
Old:
Software: Maya, Substance 3D Designer, Substance 3D Painter, Unreal Engine.
14 thoughts on “Making the manufacture materials in UE4”
I’m really loving the theme/design of your web
site. Do you ever run into any browser compatibility problems?
A few of my blog readers have complained about my website not working correctly in Explorer but looks great in Safari.
Do you have any solutions to help fix this issue?
I was suggested this blog by means of my cousin.
I’m now not sure whether this post is written via him
as nobody else recognise such special about my difficulty.
You’re incredible! Thanks!
My relatives all the time say that I am killing my time here at net, however I know I am getting knowledge everyday by reading thes fastidious content.


I love it when folks get together and share views.
Great blog, stick with it!
Thank you!
At this time it appears like WordPress is the preferred blogging platform available right now.
(from what I’ve read) Is that what you are using on your blog?
Yes, I use WordPress.
I’m really loving the theme/design of your web
site. Do you ever run into any browser compatibility problems?
A few of my blog readers have complained about my website not working correctly in Explorer but looks great in Safari.
Do you have any solutions to help fix this issue?
I have not encountered similar problems and may not have the answer to help you. Sorry about that.
좋은 게시물, 나는 그것을 내 친구들과 공유했습니다.
Thank you!
I was suggested this blog by means of my cousin.
I’m now not sure whether this post is written via him
as nobody else recognise such special about my difficulty.
You’re incredible! Thanks!
This is very interesting, You are a very skilled blogger.
I have joined your feed and look forward to seeking more of your great post.
Also, I have shared your website in my social networks!
Hello, yeah this piece of writing is truly good and I have learned lot of things from it about blogging.
thanks.
Everything is very open with a precise clarification of the challenges.
It was really informative. Your website is very helpful.
Thanks for sharing!
Glad it was helpful for you!
My relatives all the time say that I am killing my time here at net, however I know I am getting knowledge everyday by reading thes fastidious content.